Growing Apples
If you are just getting started, check out our fruit trees 101 page for beginner tips and terminology.
Pollination and Rootstocks
Apple Bloom Times
- Choose your pollinizer from the same or adjacent group. For example, apples from GROUP 2 will pollinize varieties from GROUP 1, 2 or 3. GROUP 3 will pollinize GROUP 2,3 or 4.
- Varieties marked with an asterisk* do not work as pollinizers for other varieties (they have sterile pollen).
- Varieties marked with a caret^ are partially or fully self-fertile, but planting with a pollinizer may increase crops.
- Bloom time does not correspond to ripening time. Choose varieties that ripen at different times to spread out your harvest and check to make sure you have appropriate pollinizers.
Available Rootstocks
DWARF G-41
Tree will grow 6′-9′. Precocious and productive. Resistant to fireblight and replant disease. Permanent support required. Space 6′-8′ apart.
DWARF M-26
Trees will grow 7′-12′ and are very productive and cold hardy; will not tolerate poorly drained soil. Requires staking in early years and may require permanent support in some situations. Space 7′-9′ apart.
SEMI-DWARF M-106
Trees will grow 10′-15’and produce a well anchored root system. Trees are precocious and productive, tolerating a wide range of soil conditions. Very cold hardy. Should be staked in early years. Space 10′-15′ apart.
Very Early/Group 1
Zestar
Williams’s Pride
Early/Group 2
Idared
Red Alkmene^
Yellow Transparent^
Reine des Pommes
Chehalis
Golden Russet
Scarlet Sentinel
Liberty*
Mid-Season/Group 3
Ananas Reinette
Arkansas Black
Ashmead’s Kernal*
Belmac
Ben Davis
Crimson Crisp
Crimson Topaz
Crimson Gold
Evereste Crabapple^
Freedom
Galarina™
Golden Sentinel
Grimes Golden^
-
Jonagold*
Jonamac
Karmijn*
Melrose
Northpole
Queen Cox^
Rubinette
Spartan^
Tsugaru
Beni Shogun Fuji
Prairiefire Crabapple^
Louisa Weeping Crabapple^
Late/Group 4
Cosmic Crisp
Elstar
Florina
Honeycrisp
Roxbury Russet*
Kingston Black
Yarlington Mill
Harry Masters
Jersey
Dabinett^
Golden Raindrops Crabapple^
Very Late/Group 5
Pruning and Training
Apples do not produce fruit on one-year-old wood. Most productive wood is 2-8 years old. Unpruned one-year old wood will fruit the following year (when it turns 2!). There are two forms we recommend – central leader form and open center form. We generally prefer the central leader form, but the open center form is great if you want the branches higher up so you can mow underneath.
Central Leader Form
One of the easier training styles to manage, this form works well for any rootstock. The finished form has a Christmas tree shape with scaffolds radiating out from the trunk. Each successive scaffold is shorter than the one underneath and staggered to provide as much light penetration and airflow as possible. If your new tree is unbranched, use a heading cut to prune it back to 4″ above where you want the first set of branches to start, usually 20″-30″ (lower for dwarf, higher up for semi-dwarf). If your new tree is already well branched, choose an upright shoot of similar, or smaller, caliper to the side shoots to become the leader. Chose a bottom scaffold of branches 2.5′ from the ground with 3-5 evenly spaced side shoots radiating from the trunk. Head these side shoots back to 18“. Ideally these shoots are at a 60-90 degree angle from the trunk. Develop the next scaffold staggered 20″-30″ above the first. If your new tree has enough branches for both scaffolds, great! If not, head the leader to 4″ above where you want the next scaffold to start. The leader should branch out below the cut resulting in a new scaffold the next year. Remove all other branches with thinning cuts. Tie the trunk to the stake just below the first scaffold and tie the leader every 18″-24″ either straight or at a 45-degree angle to the stake.


Open Center Form
This form is better for larger trees on semi-dwarf and standard rootstocks; central leaders on these rootstocks can get too tall quickly. This form requires a little more skilled pruning to manage well for maintaining light and airflow. Each branch is essentially managed as a central leader, yet all vegetative growth is kept clear from the center. Open center trees are managed to be narrow at the base and widest at the top. This is the best option to grow a tree with clearance underneath to prevent deer browse or to drive a mower under the tree. If your new tree is a whip, prune it back to 4“ above where you want the set of branches to start. If your new tree is already well branched, use the same method as you would for Central Leader but remove the leader. Branch angles can range from 45-90 degrees; The lower the branches start, the narrower the branch angle can be. As the tree grows, you will create little scaffolds along those branches and keep the center clear of vegetative growth. Pay close attention to how the tree grows and responds to your management.
pests and diseases
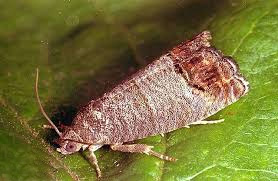
Adult Codling Moth
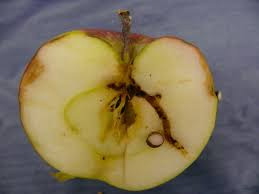
Codling Moth damage
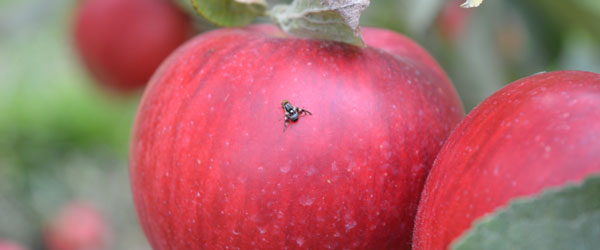
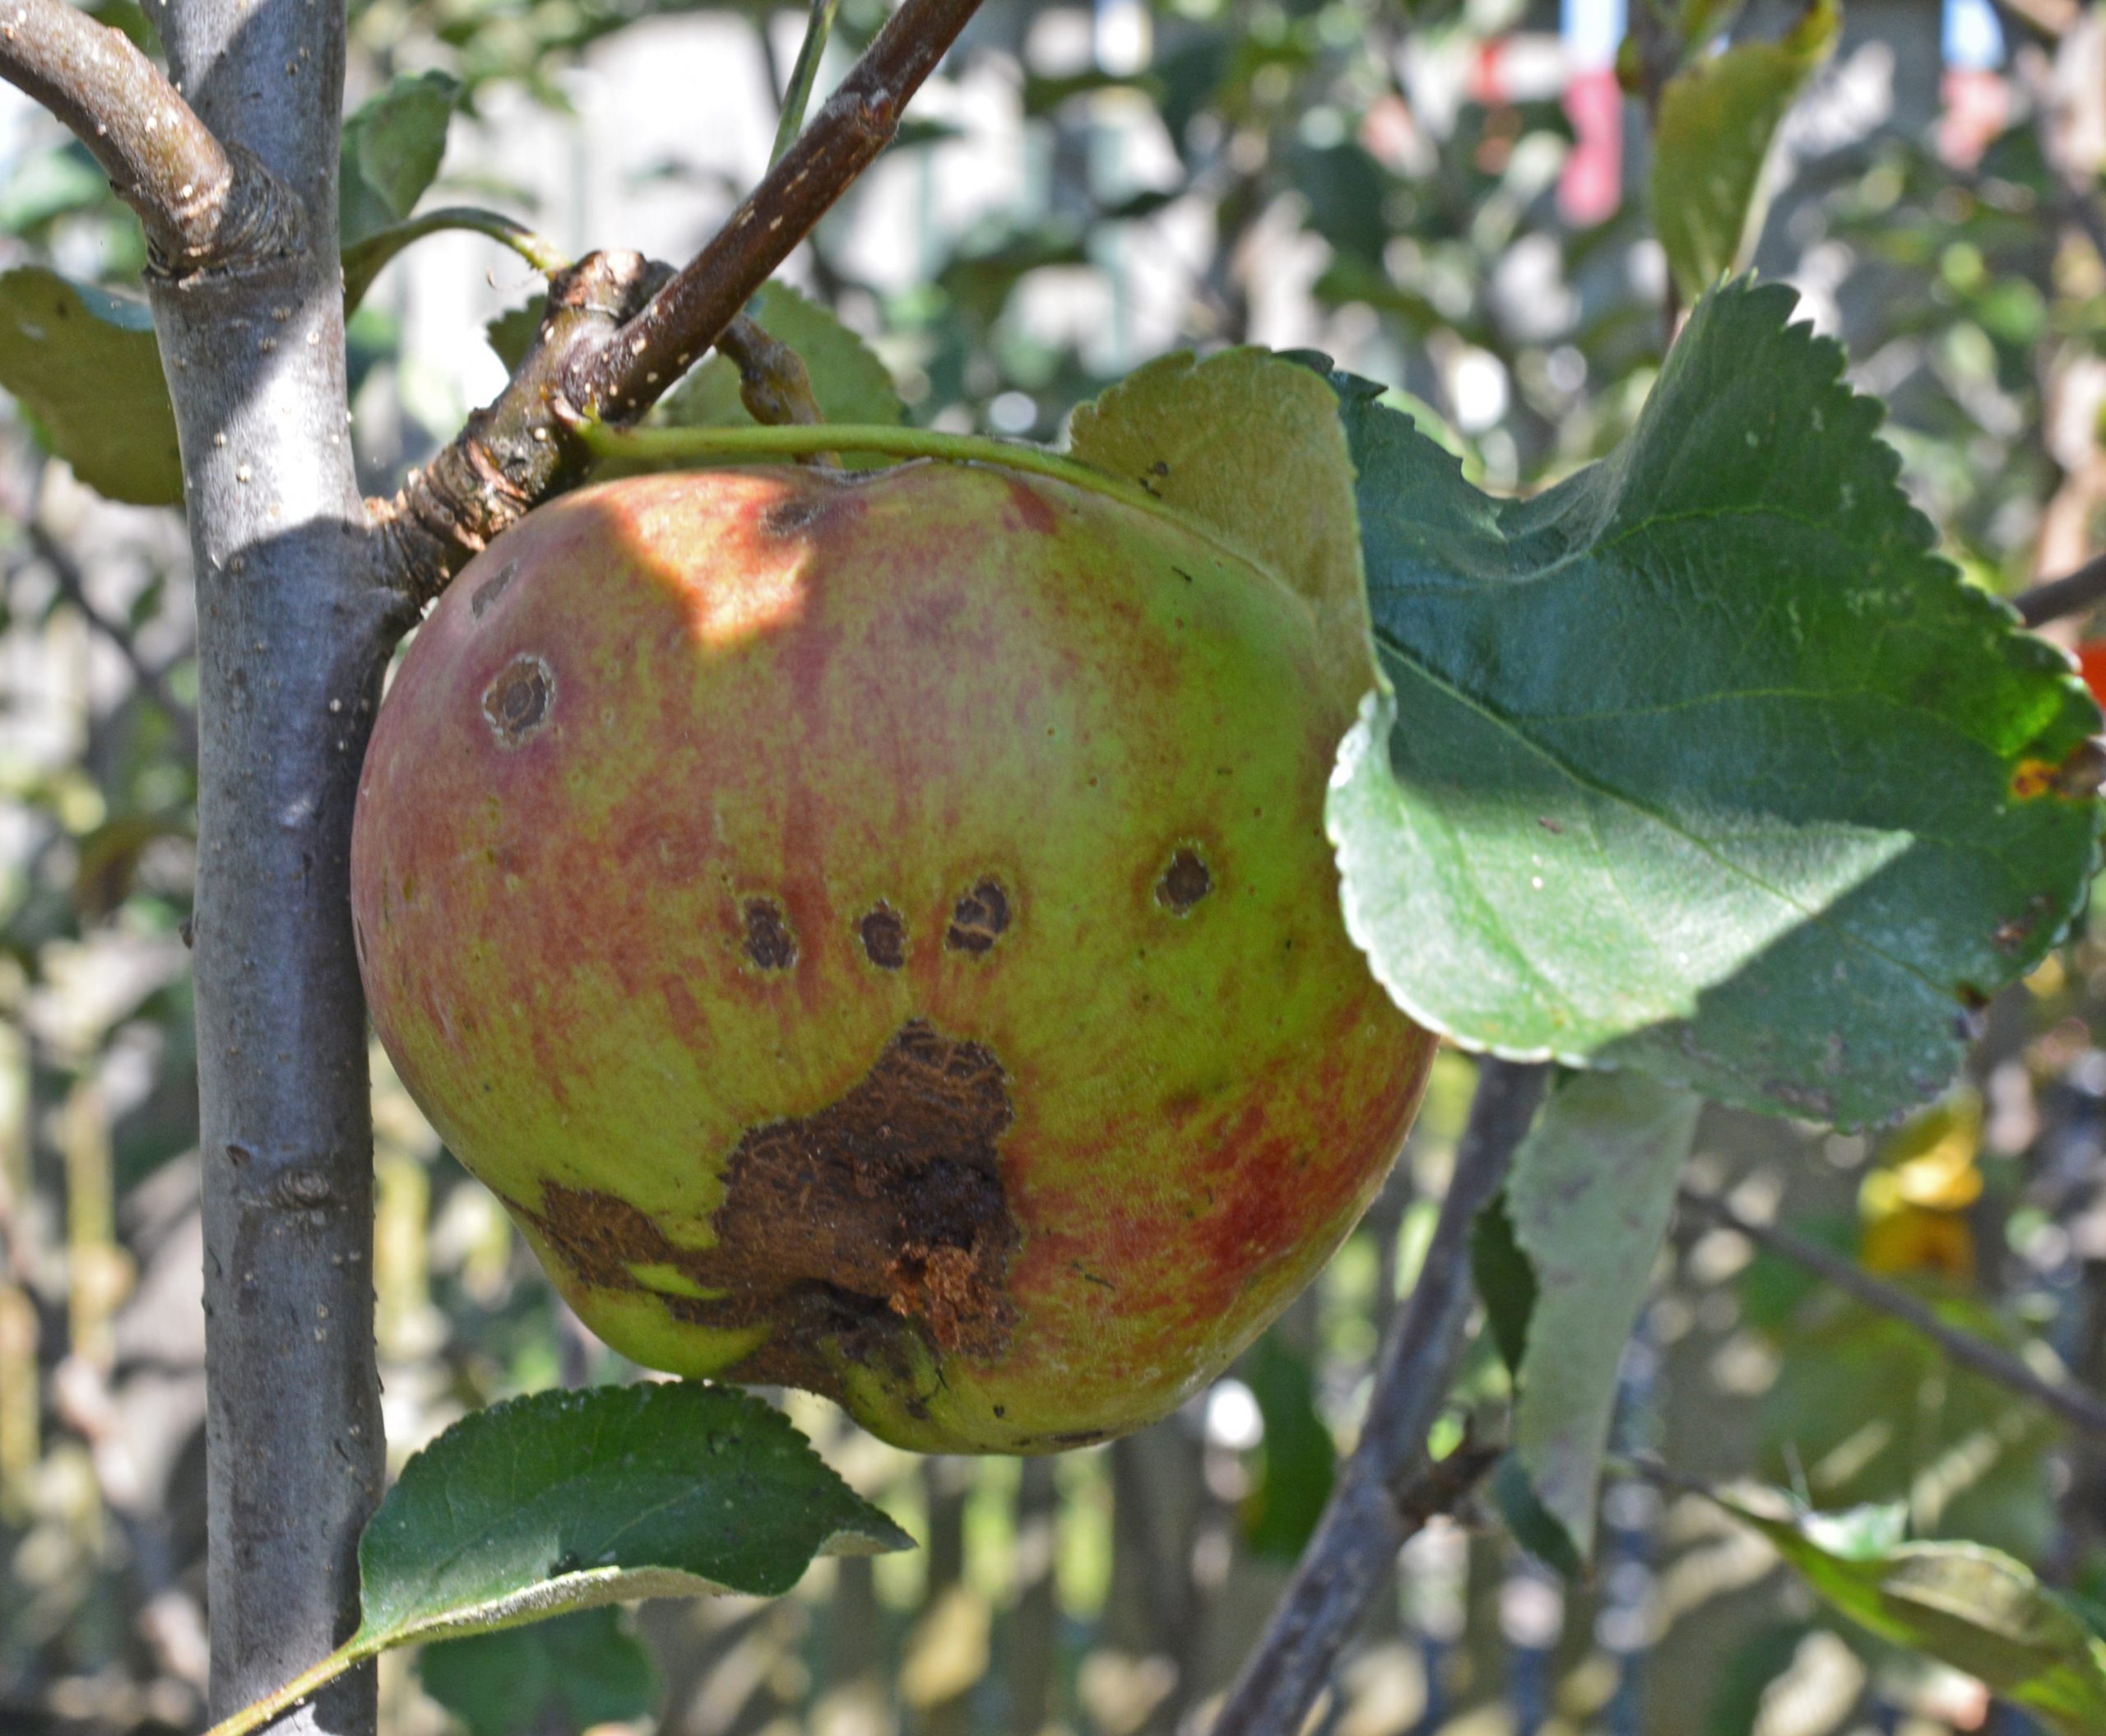
Adult Apple Maggot
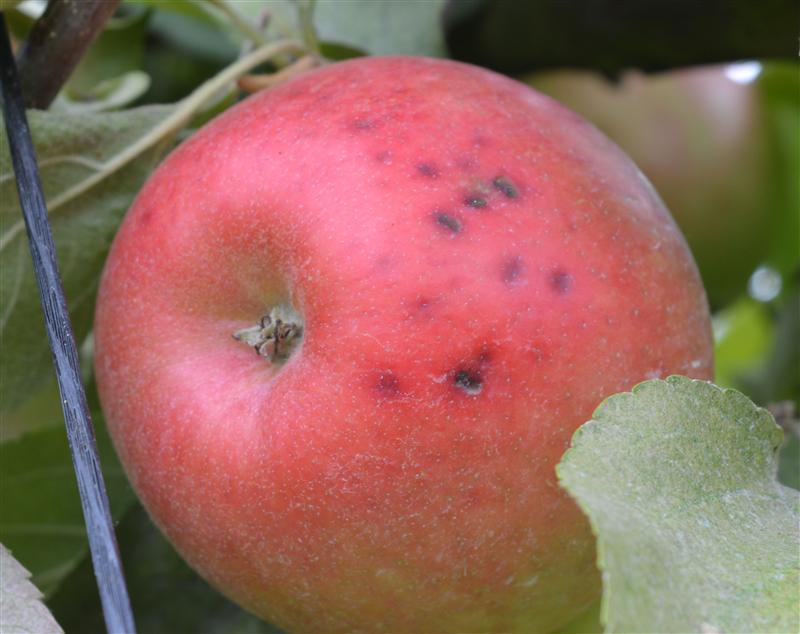
Apple Maggot fly ‘stings’
Apple Maggot trails
Scab on fruit
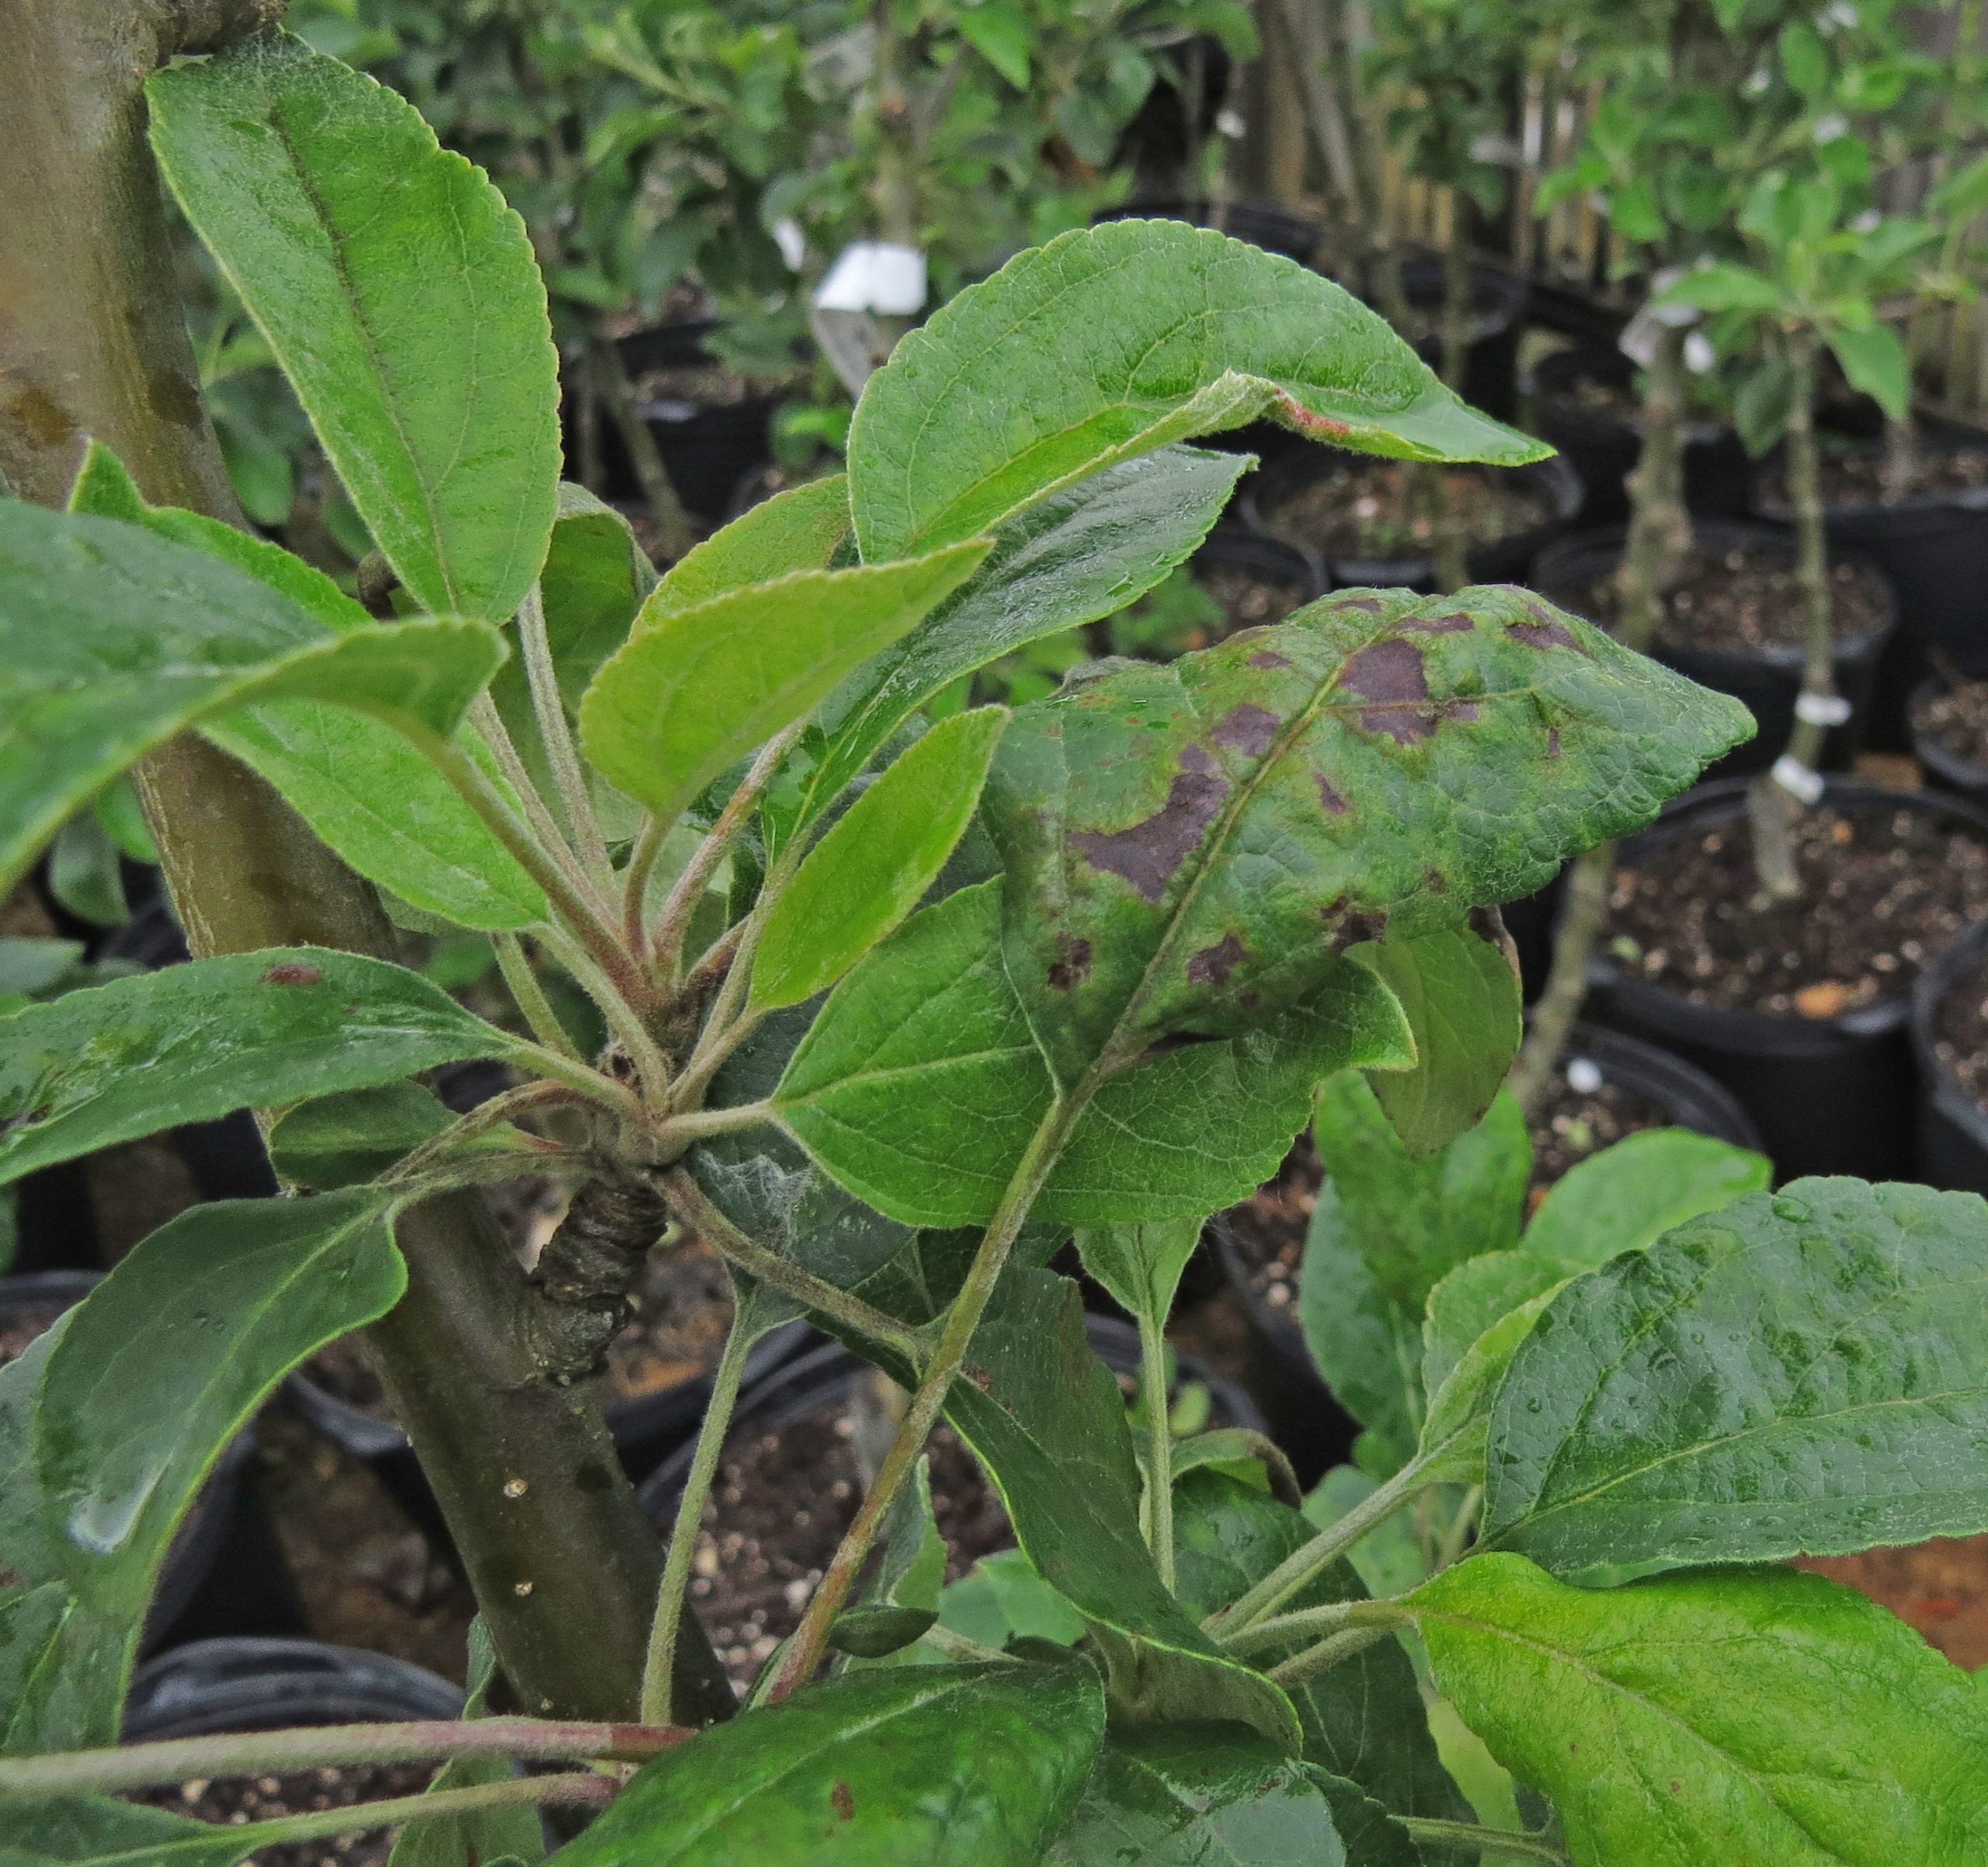
Scab on apple leaves
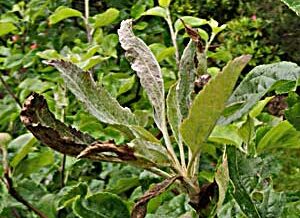
Powdery Mildew on Apple Leaves
Codling Moth and Apple Maggot
Codling moth larvae bore into the fruit causing black or brown “stings” surrounded by frass (caterpillar poop). Adult apple maggot flies emerge in late June or July. Flies deposit eggs under the apple skin leaving a visible puncture or “dimple.” The tiny 3/8” maggots feed in the fruit, causing brown irregular tunnels. Damaged fruit eventually becomes soft, rotten, and unusable.
Management: Clean up any fallen fruit as quickly as possible) and toss rather than compost. Pick fruit with visible damage and either cut out unusable parts or toss. Codling moth is much less damaging to fruit quality than apple maggot. Most codling moth damage can easily be cut out; apple maggot usually riddles the fruit and impacts flavor and texture. Maggot barriers are one of the best options for prevention. Like a nylon stocking, these barriers are tied to the fruit when it’s 1“ in diameter and prevent insects from damaging the fruit. It can be a tedious process, so this method is best if you only have a few trees. Dormant oil sprayed in late winter is another great prevention tactic and helps with other minor pests. Spinosad sprays can help treat infestations. Use online pest forecasts can help determine timing.
Scab and Powdery Mildew
Scab is a fungal disease that manifest in wet springs as dull black or grey-brown lesions on the surface of tree leaves, buds, or fruits. Scab infections on fruit are mostly cosmetic, but leaf infections can reduce the productivity of the tree. Powdery mildew is another fungal disease that infects both the leaves and fruit of apples. Powdery mildew reduces vigor, yield, and fruit quality. The fungus overwinters inside infected buds, and, once the buds open, spores from the fungus easily spread. Light grey to white powdery patches will be visible of leaves and buds.
Management: The first defense is to plant resistant varieties. For varieties that aren’t resistant, spraying sulfur when buds are green, at bloom, and again at petal fall can control scab well enough to keep your trees healthy. Practice good orchard sanitation by raking up fallen leaves in autumn.
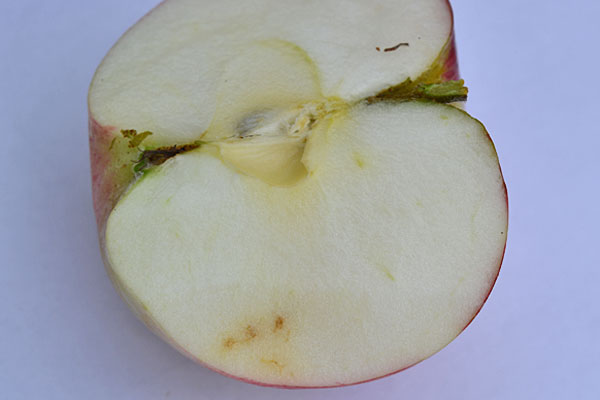
Harvest and Storage
As the fruit ripens, the starch slowly converts to sugar. If all of the starch in the apple has been converted to sugar, the apple is fully ripe, or even overripe, and will not store. You can check to see how much starch is left by testing it with iodine. Iodine reacts with starch, turning it blue-black. This test doesn’t work for all varieties, or every year, as weather can affect how fast the starch changes to sugar. But, along with tasting and background color, it can be a valuable tool. To do the test, buy tincture of iodine at the drugstore, and dilute it with water at a ratio of 1 part iodine to 10 parts water. Store this solution in a spray bottle. Take the apple you want to test and cut it across the core. Spray it with the iodine solution. The reaction happens within a few minutes. Apples that are to be stored long term should have at least 1/3 to 1/2 of their starch left. In the image, the two apples to the right have 1/3 to 1/2 of their starch left. The apple in the bottom left corner has too much starch and is underripe; the one furthest left has too much sugar and is too ripe to store.

-
- Unheated sheds or garages that are shaded often will stay cool enough for short term fruit storage. You will have to secure places like this against rodents or raccoons. This type of storage is best later in the fall when outside temperatures are already low. Very late ripening fruit is more forgiving of this type of storage as well. Your apples may not remain crisp past January but will still be usable for cooking.
-
- Small quantities can be stored in coolers, layered with paper or cardboard. The cooler insulation can help keep the temperature from fluctuating too much.
-
- Root cellar- in our climate, a true root cellar with stable year-round temperatures is not really viable, as our soil temperatures are too warm and our seasonal water table too high. However, a root cellar, or a highly insulated room on the north side of a building, or a buried chest freezer, can be used to store food in winter. These storage rooms can be kept at fairly stable temperatures, usually in the mid-40s. Be sure to open or ventilate the room to prevent ethylene gas buildup.
Year in Review
Winter
- Apply dormant oil for codling moth
- Dormant season pruning January-March
Spring
- Sulfur sprays for scab and powdery mildew (if needed)
- Monitor for pest and disease
Summer
- Pruning water sprouts in June
- When fruit is 1” in diameter, thin fruit to 1-2 per cluster to improve quality; put on maggot barriers (if using)
- Begin sprays for apple maggot and codling moth (if needed)
- Monitor for pest and disease and water as needed
Fall
- Practice good orchard sanitation: pick up fallen fruit and leaves and toss if pests or disease
- Harvest!
- Store, preserve, dry, or make cider!
